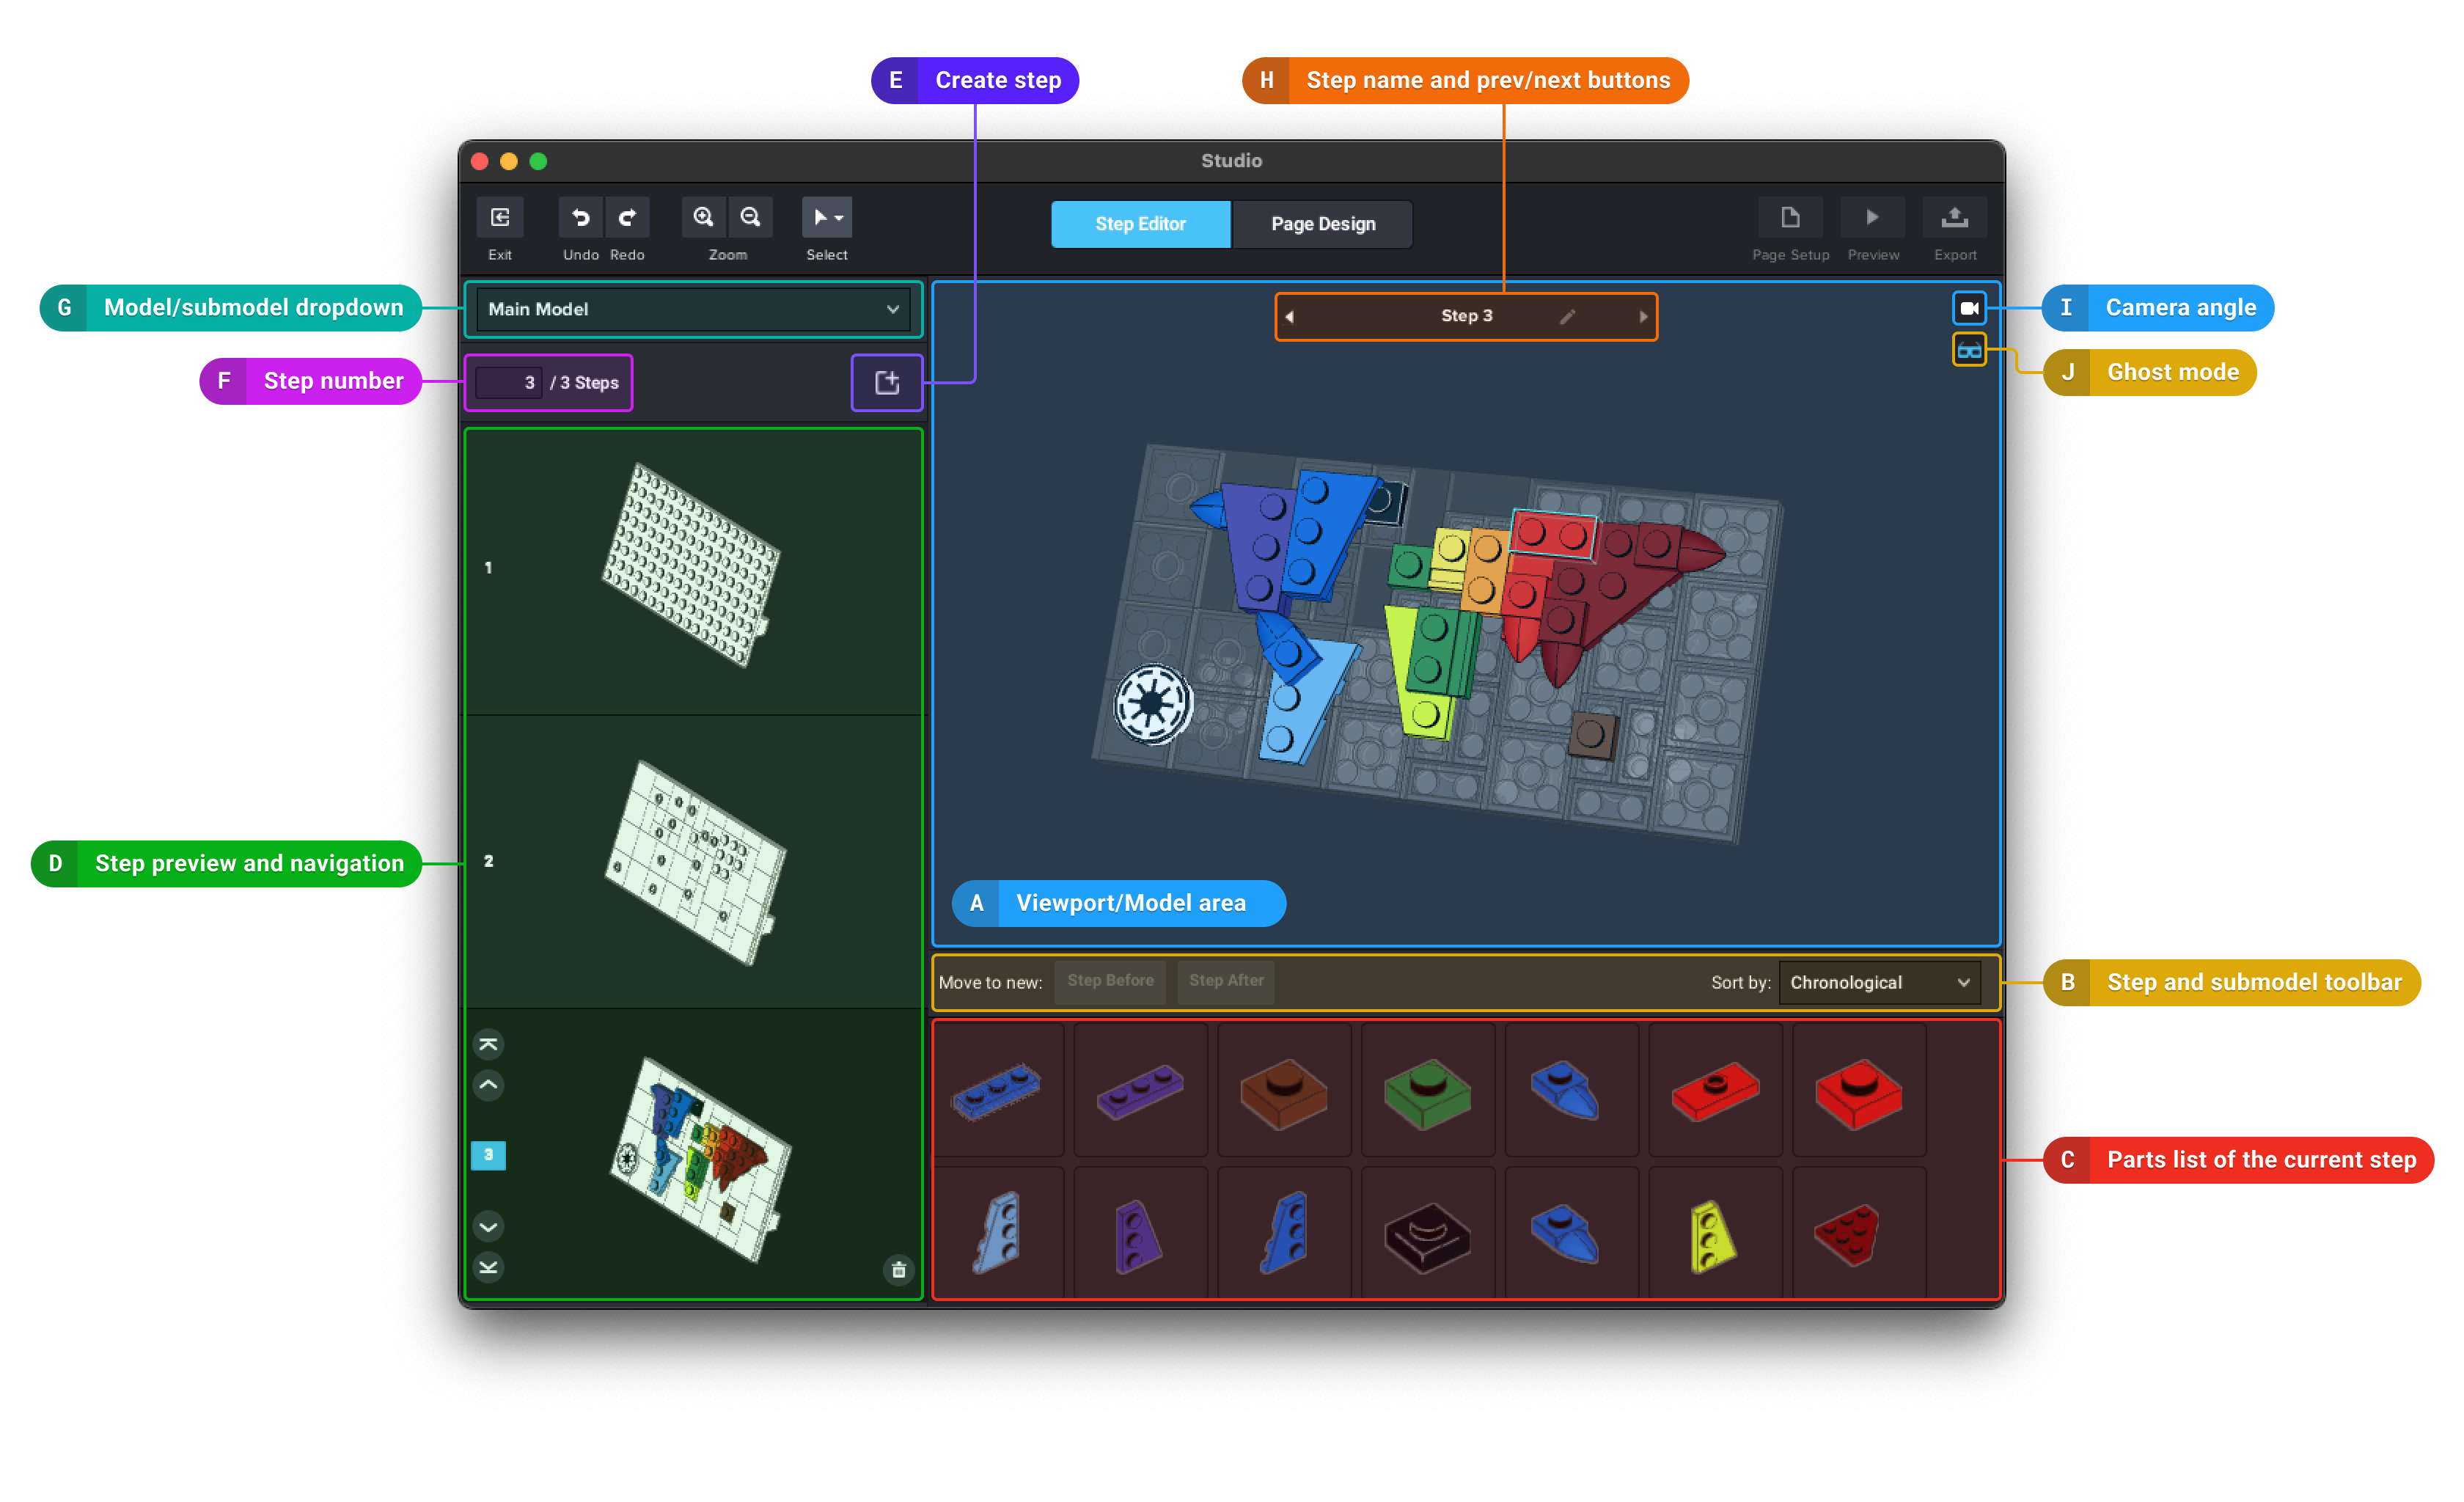
Interface Overview

A. Viewport area: Shows the current step
|
Actions |
Hotkeys |
|
Rotate the model |
Hold the right mouse button and drag or |
|
Pan the view |
Hold Shift and any mouse button and drag or Hold Space and any mouse button and drag |
|
Zoom in & out |
Use the mouse scroll wheel up and down |
|
Recenter the view |
Right-click to get the context menu and choose Reset origin |
B. Step & submodel toolbar: you’ll find buttons to move selected parts to the next or previous step, manage submodels (create, release) or to automatically create steps.
C. Parts list: shows parts and submodels used in a selected step.
D. Step preview: shows all the steps of the currently selected model/submodel.
E. Create step: this button creates a new, empty step after the current one.
F. Step number: shows a selected step number and the total number of steps in a design. Entering a number in the input field would directly jump to that step.
G. Model/submodel dropdown: shows the name of the current model/submodel and lets you choose which one you want to see and edit.
H. Step name & prev/next buttons: shows the current step number and name. The two buttons let you go to the previous or next step.
I. Camera angle: the view can be changed like in Building mode.
J. Ghost mode: switch between highlighting the new parts with an outline or ghosting the parts of the previous steps.