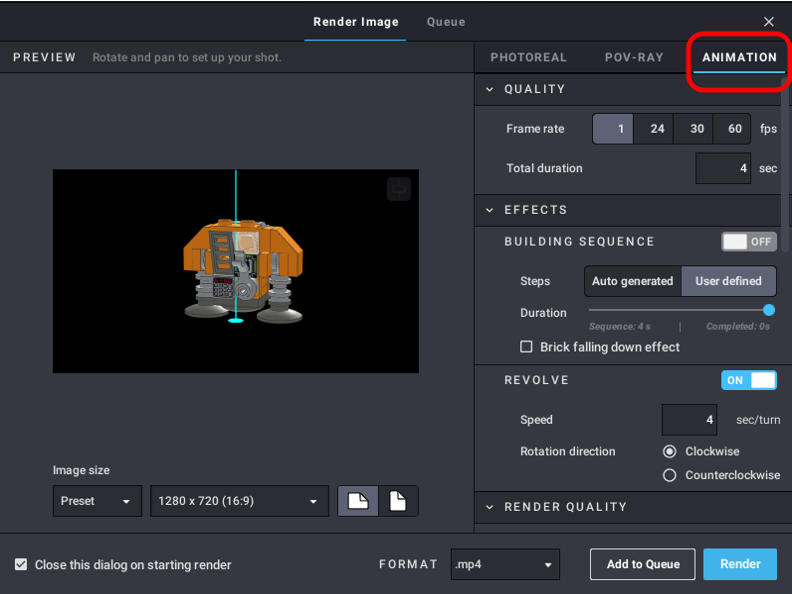
Studio can render simple animations of your design which is like a stop motion video: multiple rendered shots combined to make a video.
Making an animation
- Click Render in the toolbar or use the menu entry File | Render image…

- Choose the Animation tab

- Set the options and choose an effect.
- Click on the Render button to start rendering immediately or click Add to Queue to use the Rendering Queue.
Animation options

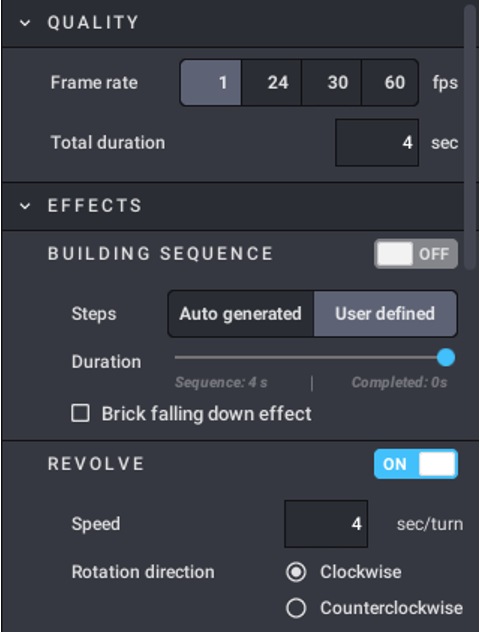
A. Frame rate and duration
Frame rate defines the number of images per second in your video. The more images, the smoother the animation. Total duration defines how long the generated video will last.
Remember that the total number of images is the frame rate multiplied by the duration. And remember that the images are rendered one by one.
B. Building sequence
With this effect, the animation will start empty and the bricks will appear (or fall down) and your design will be built.
You can let Studio define the steps or make it use the steps you defined in the Steplist or the Step Editor.
The Duration slider allows for defining how long the building sequence will take. The rest of the time will only show the completed model.
C. Revolve
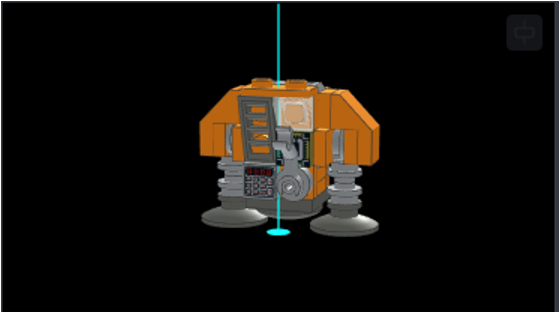
The camera will turn around the design. The axis of rotation appears in the Preview panel as soon as Revolve is enabled.

You can pan (hold the left mouse button and drag the design) to place the axis of rotation where you want.
The Speed value defines how long it takes to make a complete revolution around the design. You can also choose whether the rotation is clockwise or counterclockwise.
You can combine Revolve and Building Sequence: the camera will turn around the design while it’s being built.
If you do choose neither Revolve nor Building Sequence, the animation will be a fixed shot… but it will still take as many times as a single shot takes because all the shots will be calculated!
Output formats
Studio can write the animation in different formats:
- Multi-image GIF: To be reserved for small and short animations.
- MP4 or MOV: Standard video format.
It’s actually an MP4v video stream with Simple Profile settings, in either an MP4 or MOV container. - PNG (8 or 16bits): In this case, the name of the output file is actually a folder and the shots will be written in a subfolder named "anim", each shot named and numbered anim_#.png. You will need to use a video editor to make a video with them.
If the name you enter doesn’t exist yet, Studio will give you an alert but will still create the directory.
Other settings
As Animation also uses the EyeSight rendering engine, the other settings are the same as for Photoreal renders.
The differences are:
- Videos (.gif, .mp4, .mov) always have a colored background. Animations rendered as PNG images always have a transparent background.
- You can’t use random material effects like UV degradation or scratches because they would be different from frame to frame.
- You don’t need to use a very high render quality for animations.
- If you use the building sequence effect, remember to use the duration slide to add a small time (a few seconds) to see your completed design at the end. Or add a still shot of your model with a video editor.
- You can make multiple animations (for instance a building sequence and then a revolution) and combine them with a video editor.
- You can also make a complex stop motion video by making shot-by-shot renders of your design. Prepare the shots and send them in the rendering Queue to render them all together afterward. Then use a video editor to join the shots into a video.
- When using PNG as an output format, the frame rate can only be the information to know the total number of images to compute.